

Check back soon
Once posts are published, you’ll see them here.
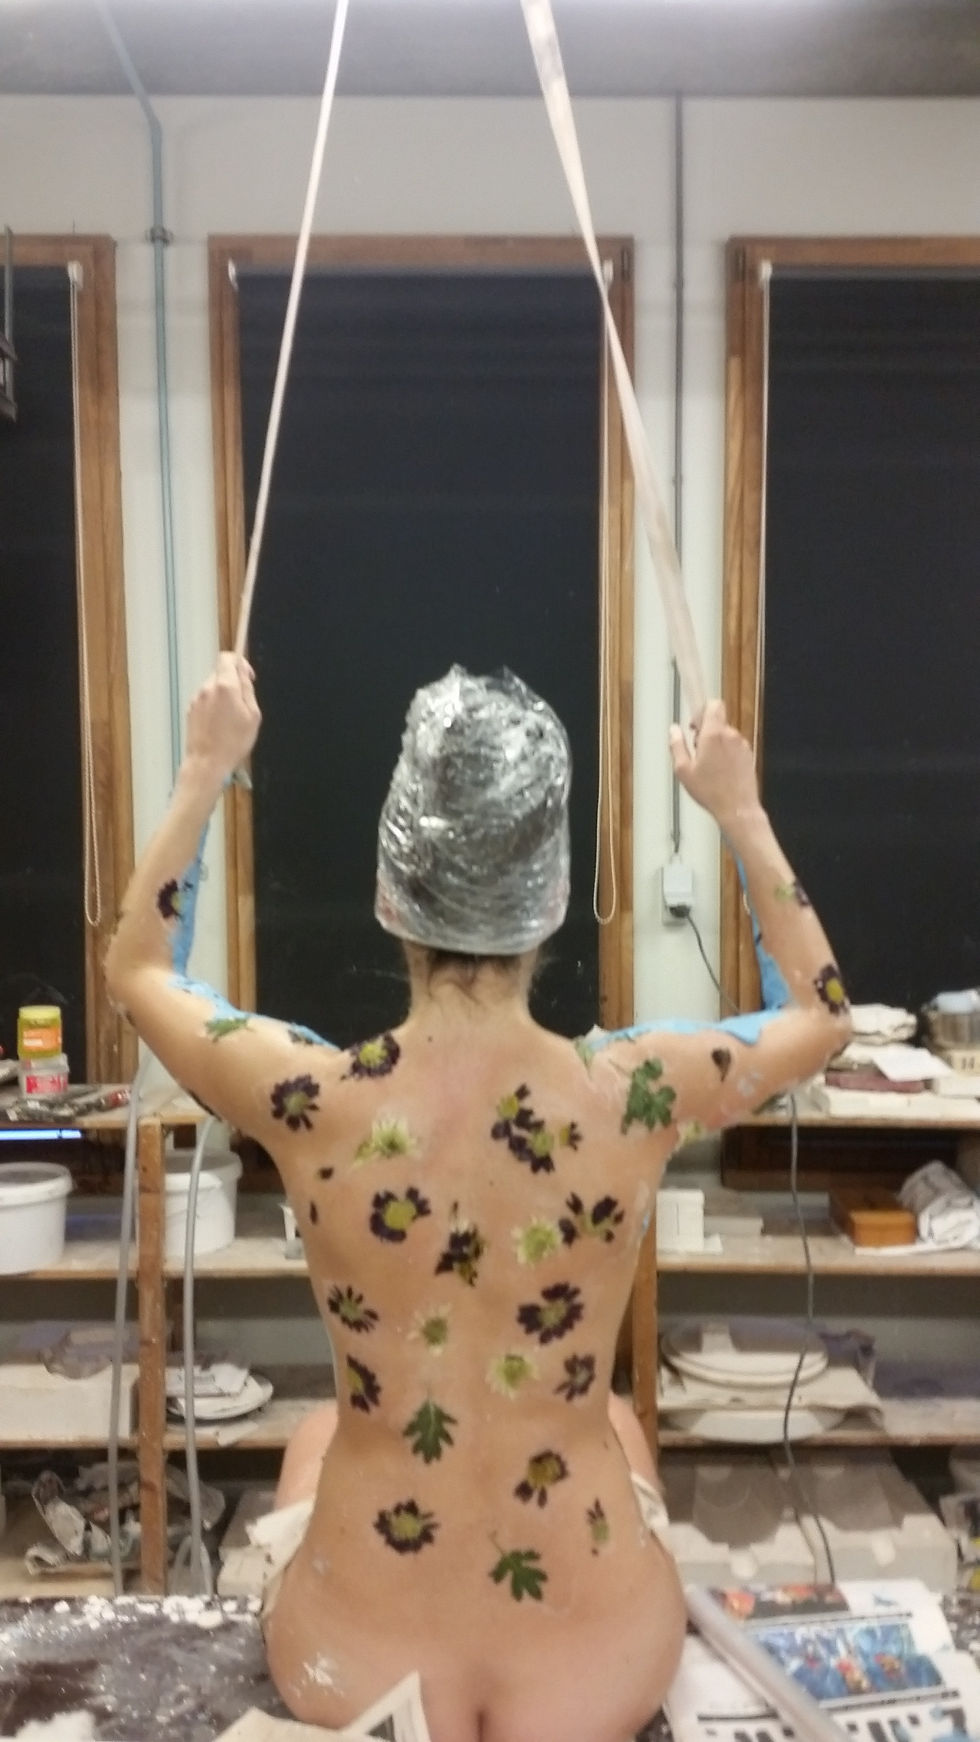
Anyone who works with life body moulding would know how challenging it can be to create the moulds efficiently when the clock is ticking on the curing time and the model sitting in an uncomfortable position. The trick I have learnt is to keep your head straight, focus and work as fast as possible. And of course it is always best to have as many educated hands helping with this process to speed things up, you really can not imagine the stress of working with life modelling until your model starts to complain that her legs are going numb and pins-and-needles, you can literally feel the tension in the air like a thick blanket.
TICK TOCK TICK TOCK!!

First of all the time it takes to apply the pressed flowers with vaseline or watered down PVA glue, which makes the model feel cold. Then the second step includes mixing the alginate in large quantities and several of us applying it quickly and efficiently before it starts to cure, it only leaves us with a 2 minute window, sometimes even less due to the body heat speeding up the curing process. The alginate is cold, which also adds to the discomfort of your model. In the image you can see that we had to place a heater on her back to add comfort.
As soon as the alginate cures to a hardened form, we then mixed plaster and dipped hessian into it to apply ontop of the alginate mould to form a reinforced 'jacket' to secure the mould in place for demoulding. We had to do the full mould in 3 steps in order to give the model a chance to stretch and move around to help with circulation.
Once each mould was complete the assisting students helped clean the model whilst I started the casting process before the alginate dries out, otherwise it will shrink and deform.

Removing the mould is a tricky business too as the alginate can still tear and compromise your cast details.

Hollow casting helps to make the sculpture lighter and allows for the metal skeletal frame to be attached inside the cast to be able to reconstruct the pieces. P purposely did not cast the hands and face as I intended for the flowers to trail through the sculpture and out through the neck and arms.
Reflecting back on the process now, I have learnt that it helps to have assistant student who have experience in body moulding to ease the process as well as not being time-restraint. We started very late in the evening so did not foresee the 5 hour process so the race against the clock added stress to the experience as the art school closes at 10pm and we were hurried along.
It also helps that each assistant know who plays which role in the moulding process to avoid any time wasted. Especially if the model is uncomfortable. A lesson also learnt is to assign 1 or 2 people to mixing the plaster in turns and another 1 or 2 applying the hessian and plaster, whereas we all scrambled around doing different things whilst under pressure and can sometimes end up in disagreements over the fine detail. Some students were new to the plaster workshop and was not fully sure how to mix plaster. Whilst I am grateful for the help offered, I would suggest using fully experienced assistants to tackle a tough job like this. Nevertheless, the moulds were made and the model was freed without her feet or arms dropping off!
Comments